Microsoft Outlook has become a very powerful tool over the years. Hotmail started the break off from ISP – based Email in 1996, meaning your inbox could be accessed anywhere in the world, not just within a given distance from your internet service provider. Microsoft acquired Hotmail and re-branded it as Microsoft Hotmail, and after years of learning and adapting to the users’ needs, they changed the platform to Outlook in 2012.
So, we can all agree Microsoft has plenty of experience with email, right?
Outlook has plenty of features that are used by the most avid users on PC and MAC, but many people have no idea about some of the amazing things Outlook offers. So, whether you’re a seasoned veteran or a dedicated Outlook student, here are…

TEMPLATES
First off, one great feature of Outlook is the ability to create email templates. By creating email templates, you won’t have to re-type those weekly reminders for your team that are always pretty much the same every week anyway.
SETUP TEMPLATES
PC
1. On the Home menu, click New E-mail.
2. In the message body, enter the content that you want.
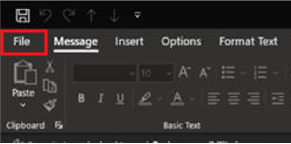
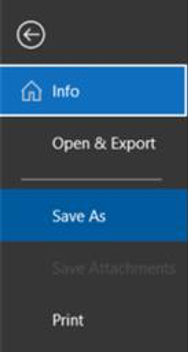
3. In the message window, click File > Save As.
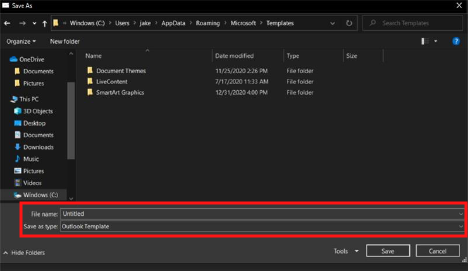
4. In the Save As dialog box, in the Save as type list, click Outlook Template.
SETUP TEMPLATES
MAC
1. Start a new email message
2. Navigate to the top of the window
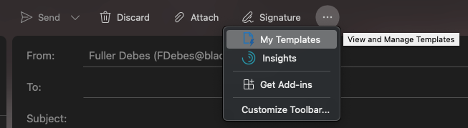
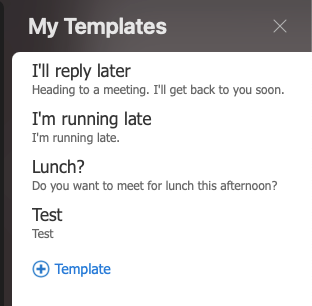
3. Click the three dots to the right of the “signature” tab, then click “My Templates”.
4. Your templates will appear to the right of you on the screen, click the “+ Template” button to create a template.
However, if you would like to save your template, so that the template can be sent to someone as a file or saved in a specified location, follow these instructions.
1. Create a new email message.
2. Type in the content you want in your template.
3. Navigate to the file tab and click “Save as Template”
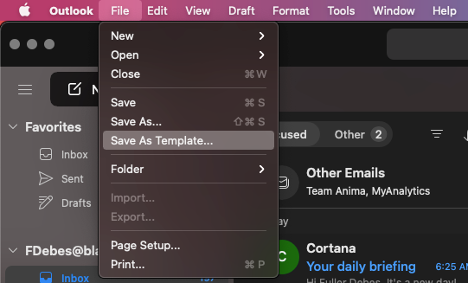
4. Save the file to your desired location, under the desired name.
CALENDARS
Outlook has finally brought an end to the long email chains that focus only on trying to schedule meetings. By using Outlook calendars, you can easily share your schedule with groups so they can see your availability.
You also have the option to color code different teams and manage permissions for whoever is viewing your calendar so they can view only, edit, or manage your calendar.
You can change the view for those who are shared by sharing the entire calendar, only titles and locations or “Only When I’m Busy.”
However, the best part is now that your schedules are shared with your collaborators, whenever you try and plan something with that person, Schedule Assist will tell you what times they are available and allow you to drag and drop your event in the green… literally.
SHARE CALENDARS
PC
1. Go to the calendar icon at the bottom left side of the window.

2. Select the calendar you wish to share in the menu on the left side of the window.
3. Select “Share Calendar”

4. Click the “Add” button on the pop up window and type in whichever email you choose to share it with.

SHARE CALENDARS
MAC
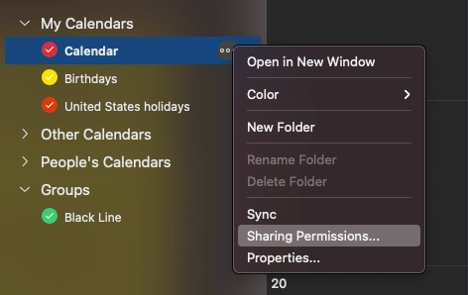
1. Go to the calendar icon at the bottom left side of the window.

2. Select the calendar you wish to share in the menu on the left side of the window.
3. Select the 3 dots next to the calendar and navigate down to “Sharing Permissions”
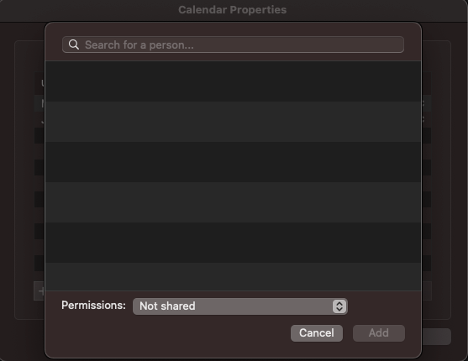
4. Click the “+” button in the dialogue box and type in whichever email you choose to share it with.
MENTIONS
Another new feature of Outlook is the ability to mention people in emails.
Picture this.
You’ve got a group emailing back and forth about a project for work, but you suddenly need to tell the multimedia specialist about a sudden change. To let them know about what you are talking about, you can include them on the conversation by simply typing “@” followed by their name. This will allow notify them and allow them to see all the important information about what they need to do without dragging them into the entire email chain.
HOW TO MENTION
1. Type the email you wish to send.
2. Whenever you are about to mention something that concerns them, type “@” and find their name by typing it out.
3. Select their name and send the email, they will receive a notification that they were mentioned.

SCHEDULE EMAILS
Outlook also allows you to schedule when an email is sent. By doing this, you can write important emails ahead of time and send them at the perfect time. This feature can be good for sending newsletters, reports, or reminders to your colleagues.
SCHEDULING EMAILS
1. Type up the email you wish to send.
2. Navigate to the send button at the top of the window.
3. Click the down arrow just to the right of the send button and click, send later.
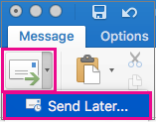

4. Select a date and time, then hit send.
CORTANA
*Outlook Mobile Only
One of the most exciting features of the new Outlook is “Play My Emails.”
This new feature allows you to listen to your emails spoken to you from Microsoft’s AI Cortana whenever you choose.
You can choose which inbox is spoken to you, whether it reads read or unread emails, and much more. You can also determine whether the messages read to you are marked as read or unread, the voice you want to Cortana to use, and even how to navigate these emails from the steering wheel of your car. Another amazing feature of Play My Emails is the ability to set-up daily reminders to be told to you at a set time. furthermore, you can set up a spoken phrase short cut with your smart device to get your emails at a moment’s notice.
The best part about Cortana is its ability to discern important information from email activities. During your daily reminder Cortana will even identify scheduling conflicts or changes and help you resolve them, using only your voice. This tool can be very helpful if you are constantly on the go and need to stay up to date and stay in sync with your team.
SETUP READ MY EMAILS
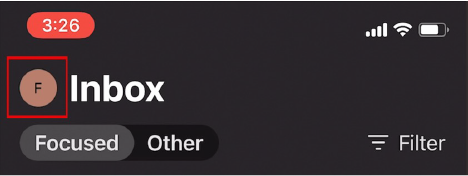
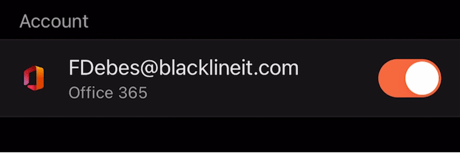
1. To set up Read My Emails, download the Outlook Mobile App on your smart device.
2. Once you’ve logged in and are viewing your inbox, tap your initials in the colored circle in the upper left corner of your screen.
5. Tap into the menu and turn on Play My Emails for whichever emails you choose.
6. Enable the use of your devices microphone and speakers when the pop-up message reveals itself and from there you are all set!
7. Connect your audio system to your device and a pop-up message will reveal itself at the bottom of the screen saying “Play My Emails”.
8. Tap the pop-up message, sit back, relax, and enjoy listening to your emails!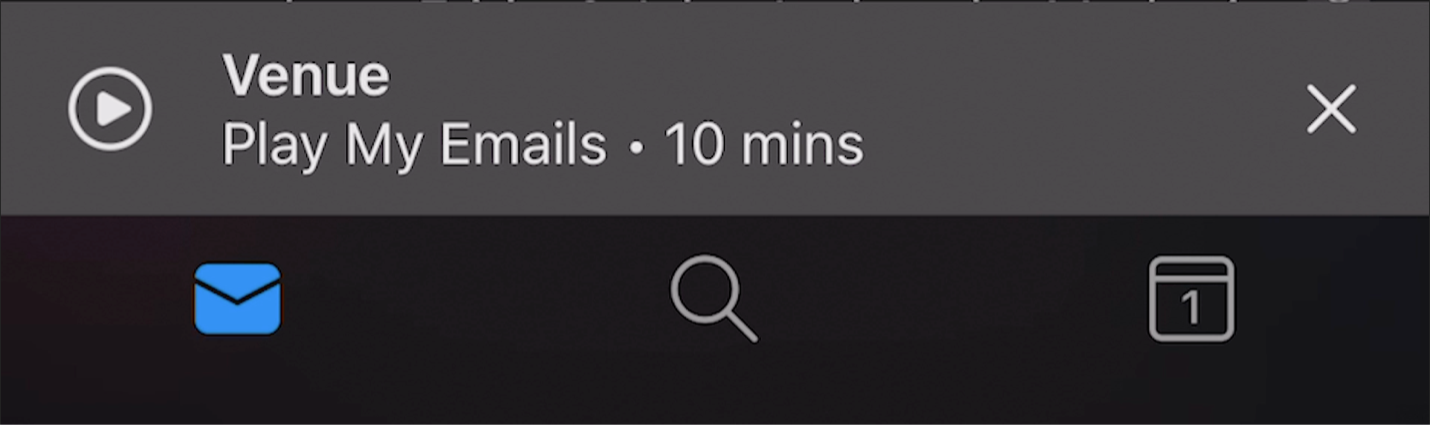
We hope these tips help you optimize your Outlook experience, so you can get the job done as efficiently as possible.
If you have any questions or additional helpful tips leave a comment below!
If you are a Black Line IT client and need assistance with Outlook or other tools, submit a help desk ticket, and we will get back to you as soon as possible.